
Our latest Project sneak peak: A Study In Throwing
Learning to throw is important at every stage of ultimate, from rookies learning a flick and a reset pass, to club veterans expanding their arsenal and refining their control.
There are numerous throwing resources available: instructional articles and books; throwing sessions with more experienced players in your community; and just playing more.
Simply throwing with a good thrower and trying to mimic movements can be very helpful. However, it can be difficult to discern which aspects of the throwing motion are personal style and which are core components of the throw. If you have someone in your community who is good at translating instructions into action (talking you through slight shifts in grip and movement), ask them for help before asking the hucker on your team who can’t really explain what they’re doing.
Over the last seven years, I have been collecting photos and video footage of top throwers, with the goal of identifying the key to throwing with power. I’ve reviewed photo bursts and slow-motion video of a couple hundred powerful throwers, as well as some less powerful throwers. I have worked with throwers as a coach, at throwing clinics, and one-on-one with teammates.
Through this work, I’m hoping to reveal key components to powerful throws, with examples from different throwers, while also identifying areas with acceptable variation and minor tips and tweaks that may help solidify technique.
For example: I have observed that the backhand grip is one of the simplest aspects of throwing. Four fingers under the rim and thumb on top. I want to take that further: How exactly are the fingers positioned? Which parts of the fingers touch which parts of the disc? Where do we create pressure and how are the hand and wrist aligned? This is where the challenging balance between rigid minutia and unhelpful generality presents itself.
Do you grab like you are shaking hands? Place the distal phalanx of the ring finger at a 60-degree angle to the rim, resting lightly on the flight plate? And what about the old league player who can throw 90 yards and uses a loose fan grip?
I’ll be asking these questions and revealing what I’ve learned this month in the UAP's Skills & Technique lab. Here’s a sneak peek at my throwing module for this August:
Let’s get started!
For a backhand huck, having a secure grip makes all the difference for being able to comfortably throw harder. I have one little exercise I like for thinking about gripping with the whole hand, plus some tips on setting up the grip and some examples of grips from powerful throwers with different hand sizes.
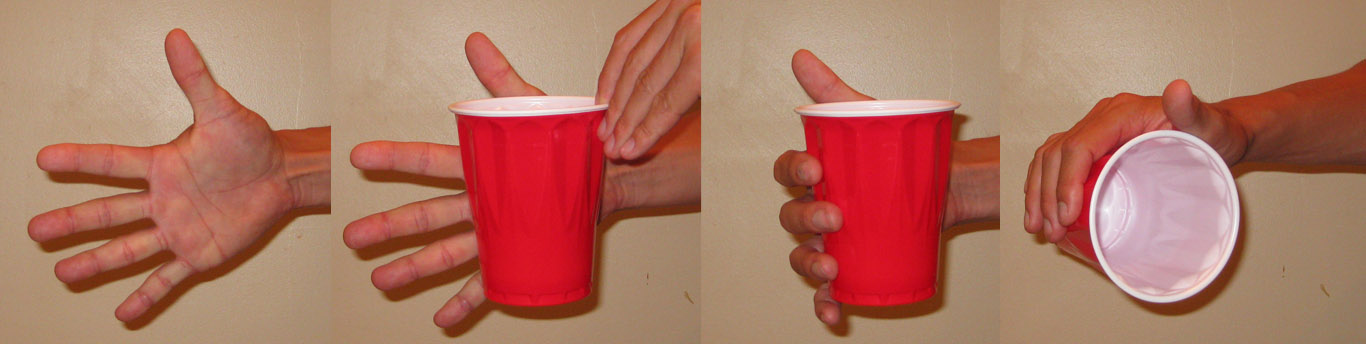
Solo Cup Exercise
If you haven’t guessed already, you’ll need a solo cup for this exercise.
- Stretch your hand wide open.
- Place a solo cup against your palm.
- Relax your hand and let your fingers and palm contact the cup. Without squeezing, you are still able to grip the cup. This is how I set up a backhand grip.I feel like it gives me a baseline of effortless grip, which increases the overall security of my hold on the disc.
Grip Tips
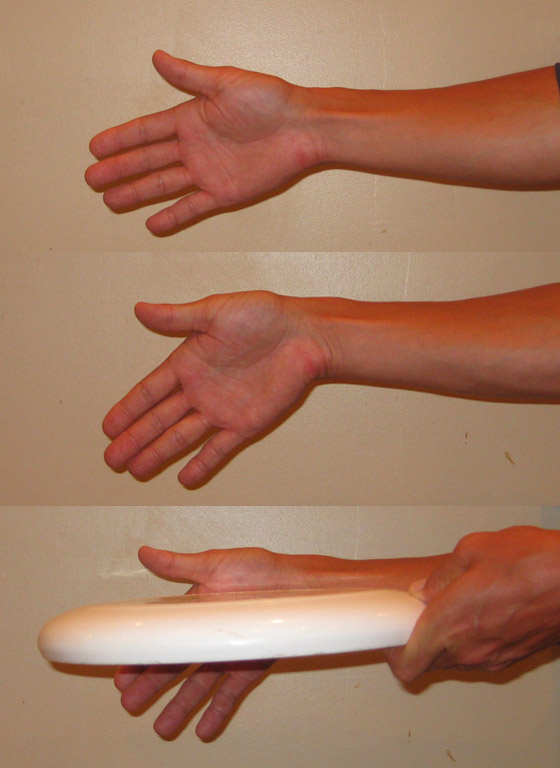
Now, try this next exercise with a disc. Lefties, reverse your grip.
- Looking at your palm, rotate your hand so your thumb is in line with your forearm, and stretch your hand open (like the solo cup exercise).
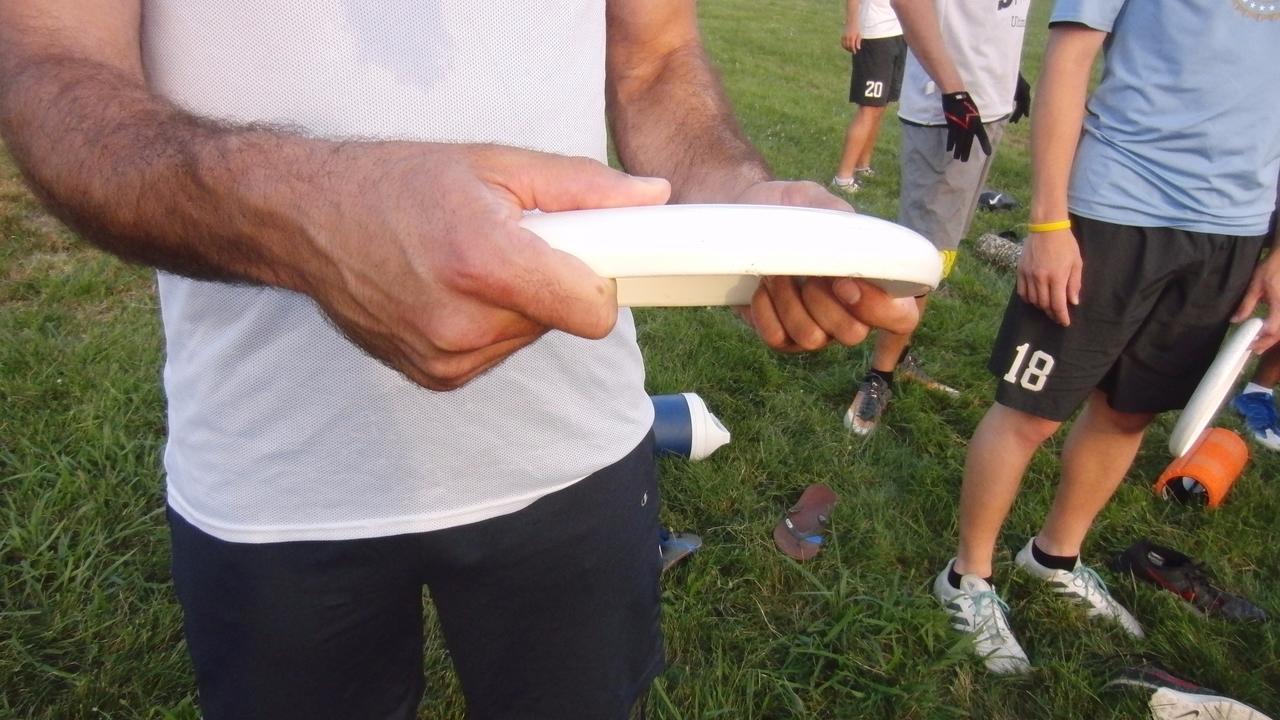
- Place the disc into your hand, in line with your forearm, running roughly from the left base of the hand up to the first crease of the forefinger. Relax your hand around the disc, and place your fingers underneath the rim, while wrapping the fleshy base of your thumb around and on top of the disc. The exact positioning may vary for your own comfort, but you should be able to cock your wrist back and bring the disc in line with your forearm (maybe touching, depending on flexibility).
- For finger placement: the forefinger and middle finger curl tightly around the rim and provide the majority of the grip strength with the thumb. Depending on hand size, the forefinger may not curl completely underneath the rim (see examples below). Having a little space between the forefinger and middle finger is common. For my grip, the ring finger and pinkie are pressed flat against the inside of the rim. Notice, these grips are not grabbing the disc inside a fist with all the fingertips curled underneath. In my view, the pictured grip provides greater and more consistent grip security and a more consistent release.
- For thumb placement: Place your thumb on the flight rings along the top of the disc. Stretching the thumb beyond the flight rings toward the center of the disc can give an airbounce effect and reduce grip security for smaller hands. (Airbounces also require extra power to travel the same distances.)
Troubleshooting and Check-ins
- If the thumb is too far forward, it becomes difficult to line the disc up with the forearm.
- Play around with the grip a little to get comfortable, and compare to examples from similar hand sizes (additional examples included in module). Don’t hesitate to use your off hand to help set your grip and even stabilize the disc on your windup.

Module Highlights
This month, I’ll invite you to film yourself to understand what your body is doing as it relates to what you are trying to get your body to do. I’ll teach core components of the backhand huck and the pull, with examples and analysis of powerful throwers. I’ll also cover some core components to the forehand huck, with additional examples from powerful throwers.. You’ll also get drills and practice exercises for you to learn the mechanics, ways to track your progress, and feedback to help you improve your technique and skill.
Like what you see? Join Colin and the rest of our community in the Skills & Technique project. You can sign up now for his August throwing module, right here.
